Installing
Joomla is simple. It basically involves the following steps:
- Get the Joomla package
- Unzip it and transfer the files to your site
- Run the install program from your browser
- Modify some file permissions on your server
In this tutorial I will install Jommla on a local server for demonstration purposes.
Joomla is a PHP program. Your server needs to have PHP installed. The installation tutorials will show how to install Joomla on XAMPP, a package includes PHP, mysql, apache server.
Using XAMPP will save time and effort.
Installation
Procedures:
1.
Get the latest
package from joomla website www.joomla.org
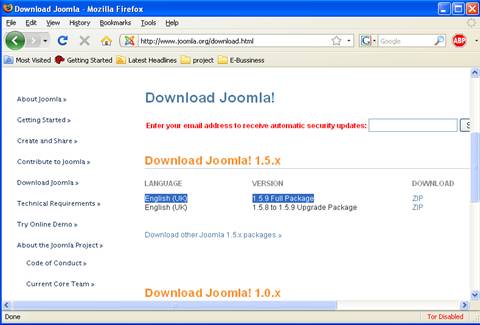
2.
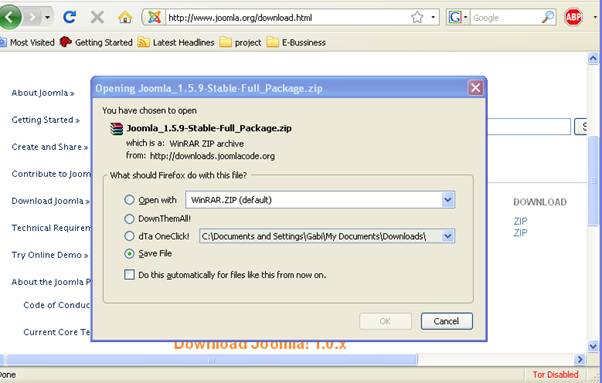
Download and save
the latest package to your local system
--- currently the latest release is 1.5.9
3.
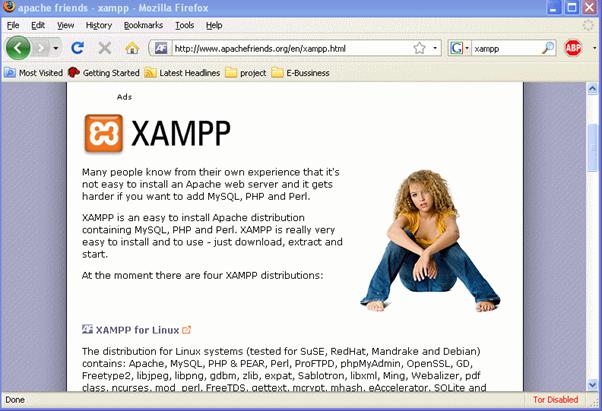
Download XAMPP
(PHP&Mysql&apache ) from http://www.apachefriends.org/en/xampp.html
4.
Run the XAMPP
installation source you just downloaded
5.
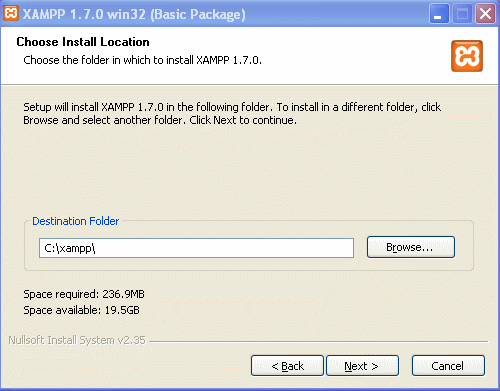
Choose the
destination folder on your local system --- I prefer install it on the root of
your C drive
6.
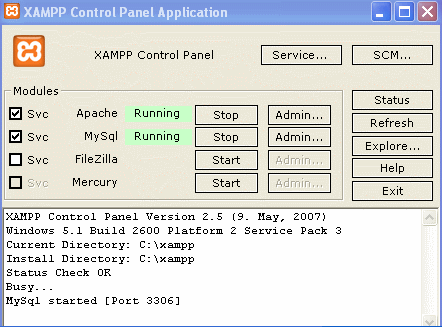
When finish
installation, run XAMPP control panel
7.
Tick on Apache and
MySql and start their services
8.
Now open up your
internet browser and browse to http://localhost
9.
If all went well you
should see the XAMPP appears on your browser

10.
Now we are good to
go to install joomla
11.
Select a Directory for Installation, You have to decide
whether Joomla! needs to be installed directly into a document directory or a
subdirectory. This is important, since many users prefer a short URL to their
homepage.
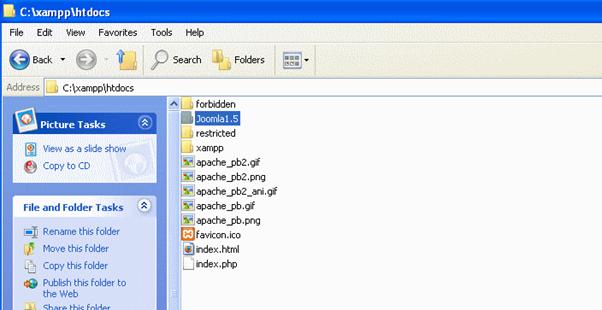
12. I
recommend that you create a subdirectory named Joomla150 under the document directory in Windows using
Windows Explorer. C:/xampp/htdocs/Joomla150/
13.
Unpack the
downloaded joomla files to the above
directory
Joomla!
Web Installer
From now on, everything is going to go lightning
fast because the Joomla! web installer will be taking command. Go to http://localhost/Joomla150/.
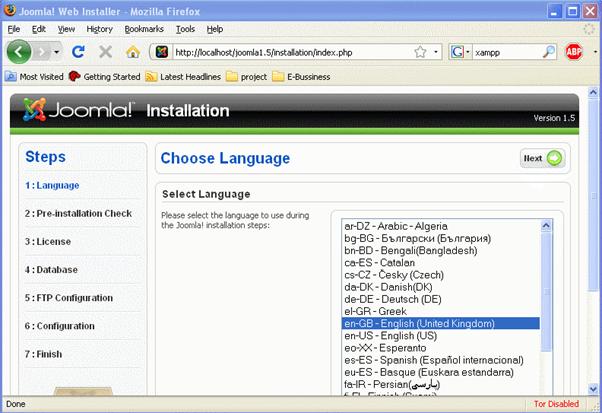
Step 1: Language Selection
Choose Language is the
first of a total of seven installation steps. Select the desired language and
click on the Next button.
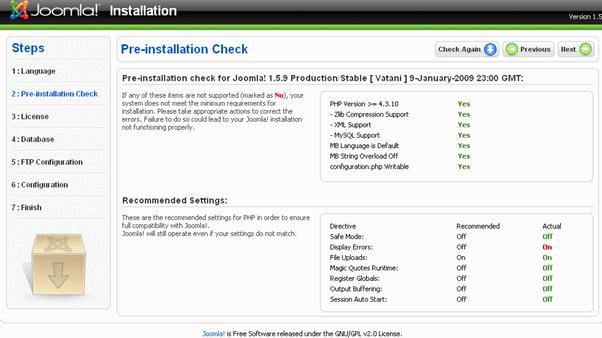
Step 2: Pre-Installation Check
Next, you will see the Pre-Installation
check. This check should help you determine whether your server environment
is suitable for a Joomla! installation. If you predominantly see green test results,
it is a good sign
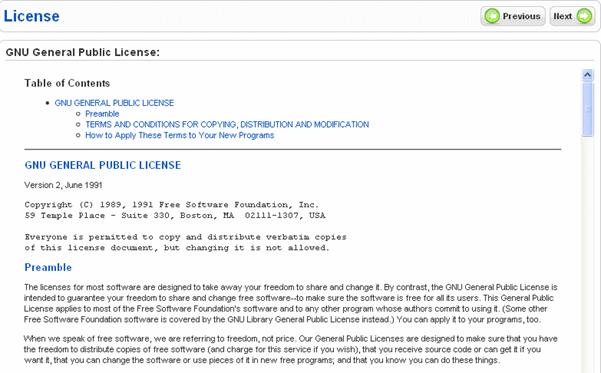
Step 3: Licence
Every piece of software is licensed under certain conditions. Joomla! uses the GNU/GPL licence, version 2.0. read and click Next
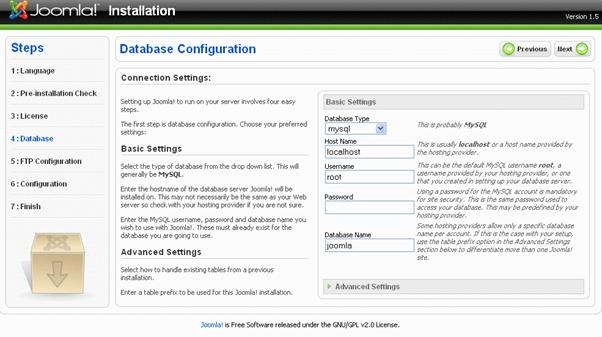
Step 4: Database Configuration
In the fourth step, Database Configuration, your database parameters are queried. You can set up as many databases as required in an XAMPP server environment and you have a MySQL user with the name root (without a password). The user root is the MySQL administrator and can do everything in the MySQL system. An installation without a password is a significant security risk. In the beginning, locally, in order to get the system up and running as quickly as possible, this is not a problem. But in the long term, you should absolutely provide your XAMPP installation with passwords in security check (http://localhost/security/).
Step 5: FTP Configuration
In order to stop problems with access rights and a possibly activated PHP Safe Mode in their track, you have the option of using PHP's FTP functions for uploading and handling of files starting with Joomla! 1.5. This is not necessary in the local XAMPP Lite installation. But if you install Joomla! on the virtual web server of a provider, enter here the FTP data that your provider has given to you. If your provider permits these functions, it is advisable from a security perspective to set up different FTP accounts for yourself as user and for Joomla! and to activate the Joomla! FTP account only for the respective Joomla! directory.
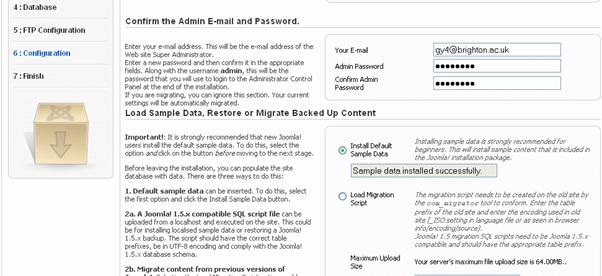
Step 6: Configuration
This main step of the configuration is divided into three parts.
The first part of the configuration has to do with the name of your website. This name appears in the header of the browser window when somebody accesses your website. This name is also used in other places, for example, with confirmation emails to registered users. I have chosen the name Joomla! 1.5.0 for our example site.
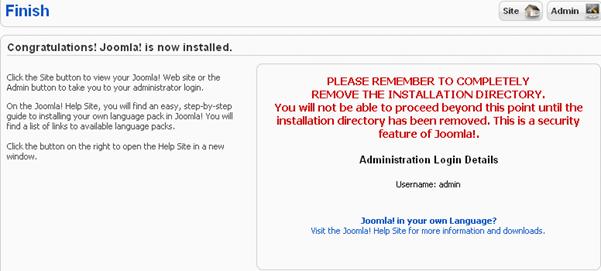
Step 7: Completion
The seventh and final step congratulates you on a successful installation delete the installation directory. Take good heed of this notice, because your Joomla! website will not run without this step.